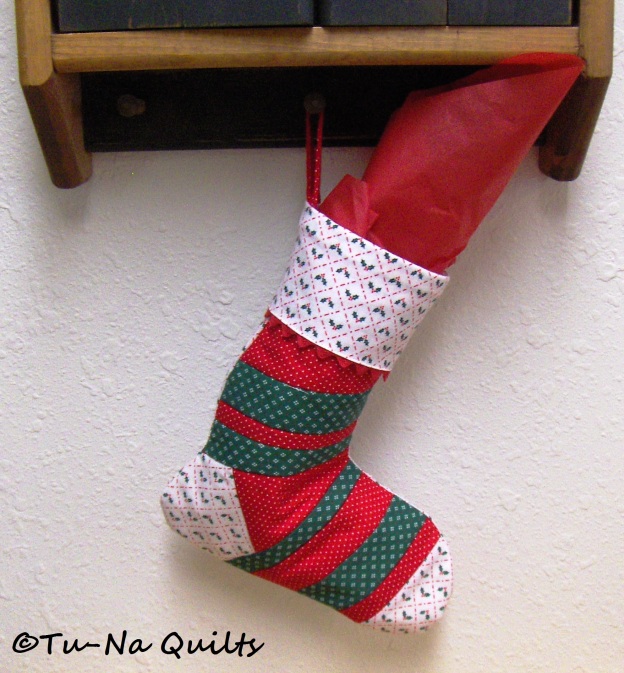
To answer that question, that little quilted stocking actually holds a lot! So far we have:
Let’s see what else it holds.
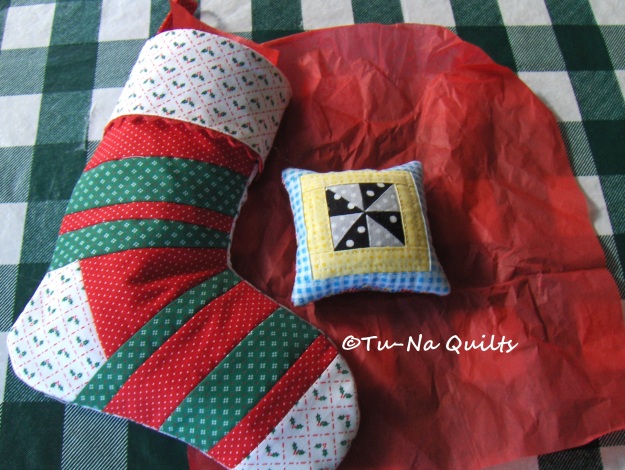
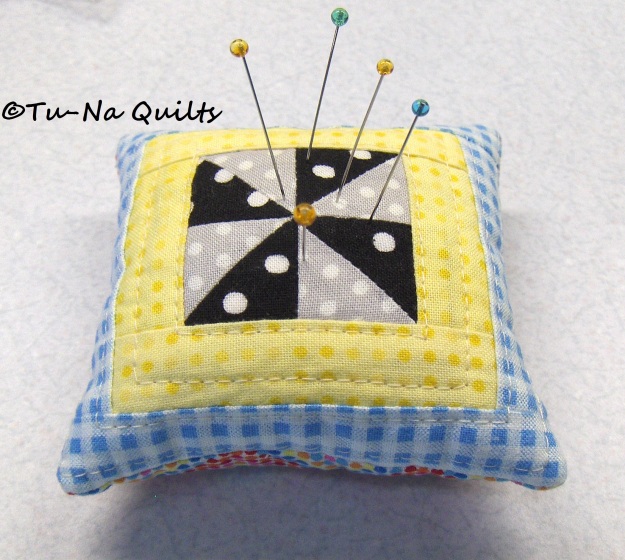
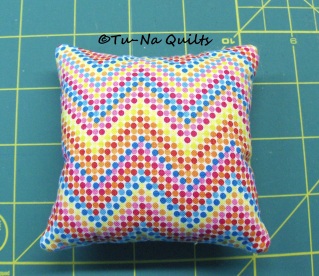
There’s an itty bitty Pretty Pillow Pincushion. It measures 3.5″. The center pinwheel block is only 1.5″.
I’ve been wanting to try sewing some of those Marvelous Mini Monday blocks from the Temecula Quilt Co. but have been warned that they are tedious and tricky. I decided to prove to myself that I could indeed make them. I chose this pinwheel block (free pattern found here) but didn’t want to sew them into a mini quilt. After some thinking, I decided it would be perfect for a little pillow pincushion similar to the one I’d seen on Crazy Mom Quilts found here.
I didn’t find it difficult at all as long as I paid close attention to cutting accurately and using a scant 1/4″ seam allowance. I think I’ll be making more of these Pretty Pillow Pincushions. Maybe you’d like to make one, too.
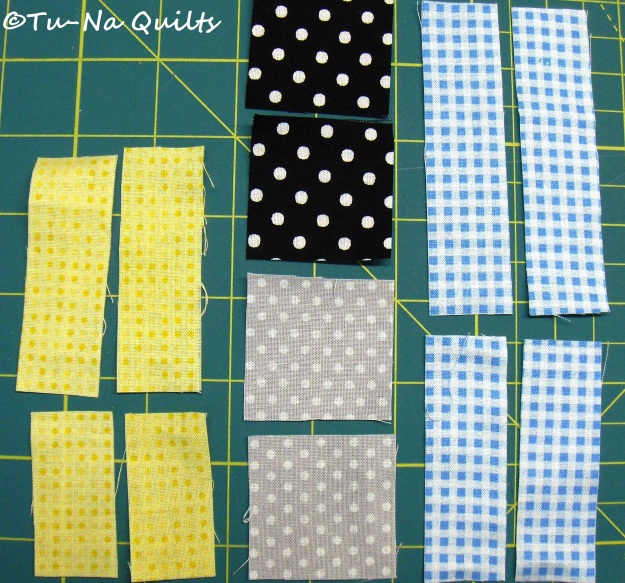
Materials Needed:
- Two 1 3/4″ squares cut from a dark print
- Two 1 3/4″ squares cut from a light print
- Two 1″ x 2″ and two 1″ x 3″ pieces for inner border
- Two 1″ x 3″ and two 1″ x 4″ pieces for outer border
- 4″ x 4″ square for back
- 4 1/2″ x 4 1/2″ square of batting
- 3 3/4″ x 3 3/4″ square of fusible light or medium weight interfacing
- Crushed walnut shells or other stuffing (See my post here for more discussion about crushed walnut shells and making a crushed walnut shell dispensing bottle-a.k.a. mustard bottle)
- a small amount of poly fiber fil or stuffing
- Thread
Directions:
Shorten your stitch length to 1.5. All seams are sewn with a scant 1/4″ unless noted.
Make half square triangles using the squares. With right sides together, place a dark and light square together. Placing my handy little ruler with the line that will connect the points, I drew a diagonal line 1/4″ on each side that line. Do this with the other set. Sew just a tad bit to the left of the line as shown in the pictures below.
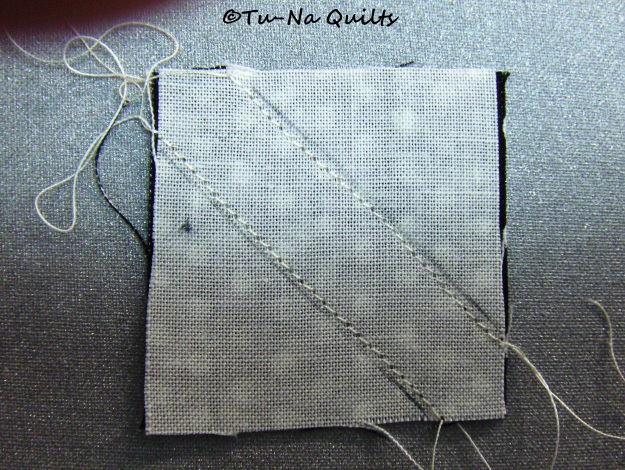
See how my stitching line is just on the inside of the drawn lines
Lay your ruler edge across the points, approx. down the middle between the stitching and cut. This will give you two itty bitty blocks. Do this with the other squares.
Press seams open (I always use spray starch when working with small pieces.) Square block by lining up the diagonal line on your ruler over the seam edge and trimming to 1 1/4″.

I think trimming accurately here ensures the block will end up the correct size.
Do this with the other set of squares so you will finish with four itty bitty pieces. Arrange them as in the pattern pictured below and sew the top two blocks together (seam 1 as noted in the picture below). Then sew the bottom two blocks together (seam 2 as noted in the picture below).
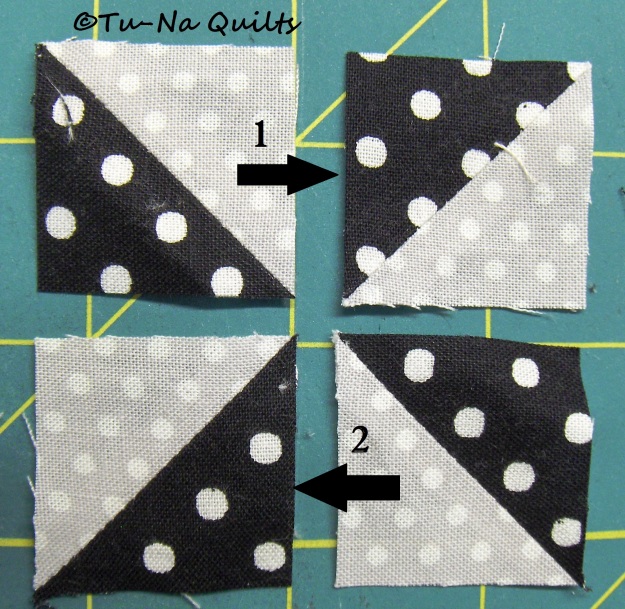
Press seams open and then sew the two halves together. Press seam open.
Square your block to 2″. There is your cute itty bitty center for your Pretty Pillow Pincushion.

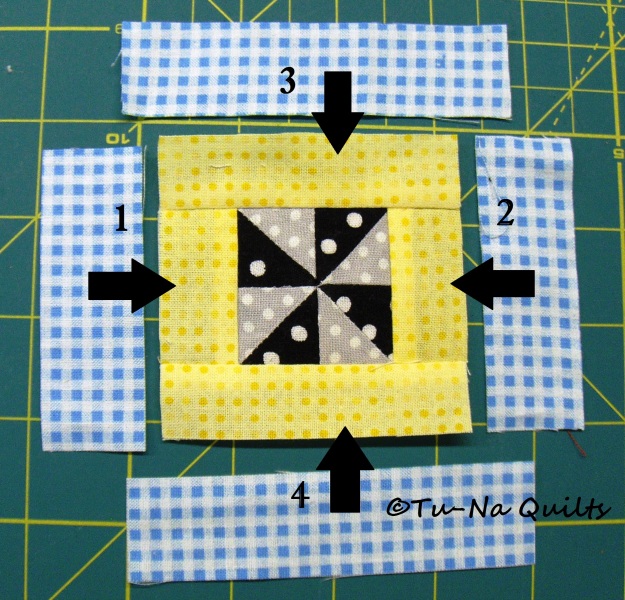
Add the side borders by sewing right sides together joining seam 1 (as pictured below) first. Press seam toward side. It will go there naturally because of the bulk. Then sew the other side border seam 2 (as pictured below). Press seam toward side.
Now you are ready to sew on the top and bottom border pieces. Sew the top seam (3 as pictured below) onto the top and press towards the side. Sew bottom border (4 as pictured below) and press seam towards the side.

Are you ready for the last border? Sew side seams first (1 then 2) and press seams to the side. Sew on top border (seam 3 as pictured below) and then sew on bottom border (4 as pictured below). Press seams to the side.
Beautiful!

It’s only 4″ square with the center pinwheel only 1.5″. What can I say? I dabble in small pieces. Do you?
Center the top on the batting square. Pin in place.
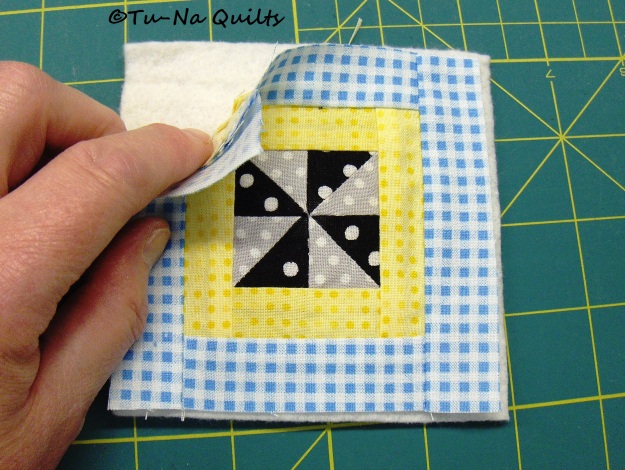
Lengthen stitch length to 3.0 and quilt as desired. I quilted straight lines about 1/4″ apart in the borders only.

Since this block is so tiny, I only had to sew four rows to quilt it. I did not quilt the center. I figured there was plenty of stitching there already.
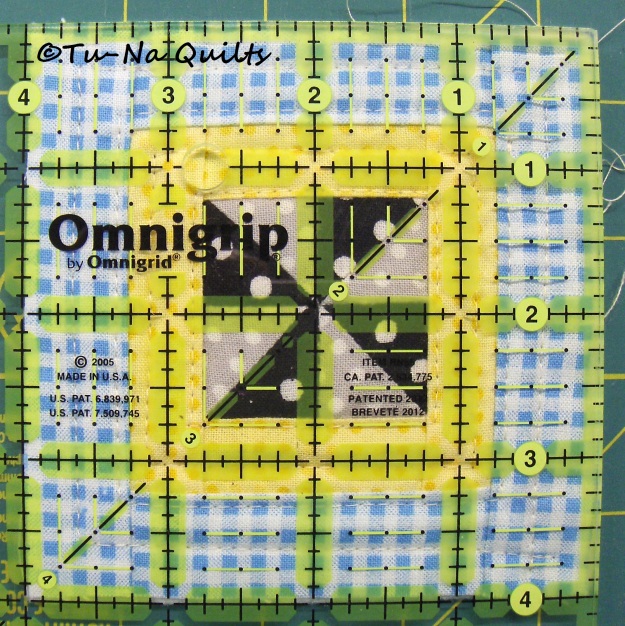
Square to 4″.
Iron interfacing onto back side of backing fabric.
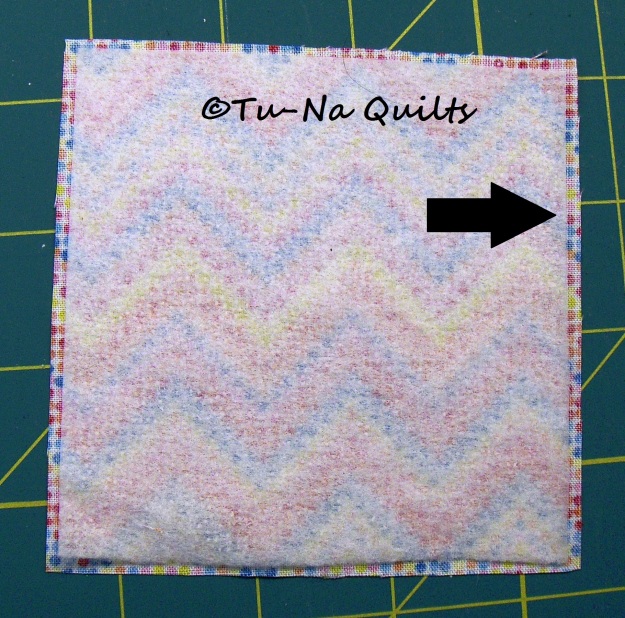
The backing extends beyond the interfacing around all sides. This allows me to heat set it without risk of getting the sticky stuff on my ironing board or my iron. An alternative would be covering it with a cloth. Follow the manufacturer directions to heat set it.
Reset stitch length to 1.5. Place top and backing with right sides together and stitch 1/4″ inch around all sides leaving about a 2 inch opening for turning on one side. Backstitch at both ends.

Trim corners at a diagonal. Trim close but not too close.
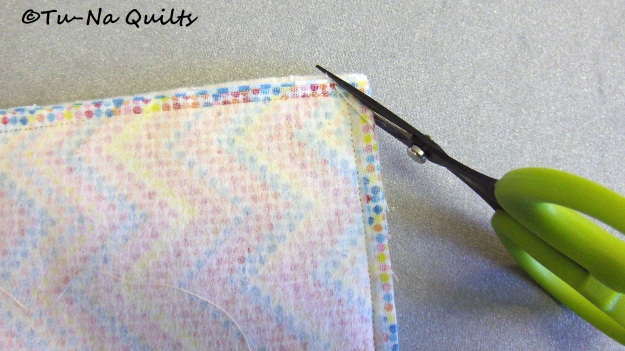
Trimming off the corners reduces the bulk.
Turn right side out and gently push out corners. I use a knitting needle. Fold seam allowance of opening under and press to aid you when closing the opening.
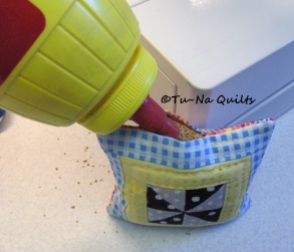
Fill with crushed walnut shells. I love the crushed walnut shell dispensing bottle I made a.k.a. mustard bottle. I’ve not only used it for all three of these pincushions I’ve made for the blog hop but also for many others. Shake the pillow and tap it up and down on the table to help settle the walnut shells. Use your finger to push them down, too. You want the pillow to be filled full so it is firm. It will settle and soften as you use it. Work to get some into the top corners.
Once it is filled as full as you want, add a bit of poly fiber fil or stuffing to cover the shells exposed at the opening. This helps keep them in the cushion while you sew. Hand sew the opening closed with tiny, close stitches.
This one is almost too cute to stick pins in.
But that’s what it’s for.
The 12 Days of Christmas in July Blog Hop continues:
Sunday, July 23rd, 2017
Bells are Ringing…Silver Bells…Jingle Bells—Day 10 of the 12 Days of Christmas in July Blog Hop
Confessions of a Fabric Addict Today’s assignment is just as I suspected; finishing the final quarter for the Santa’s Trip Around the World Quilt so be prepared for a new assignment tomorrow. Sarah’s also sharing a bunch of ideas for cute. little gifts to give quilters. You may just want to make one of each for yourself, too.
Mel’s Quilting Blog Meloney’s sharing a trio of little gift ideas that are perfect for teachers, or guild members, or neighbors. No one on your list needs to be left crying or looking for a tissue. Go see for yourself.
Resourceful Momma Mel persevered some obstacles to create a cute little project for the hop. She’s even offering it as a free pattern download. Those of you who enjoy embroidery or want to learn, this is your chance to create a cute center block for your wall hanging, table topper, or pillow cover. Who can resist that impish smile?
Cheryl’s Teapots2Quilting If you haven’t come up with an idea or two for Christmas this year, stop by Cheryl’s blog. Her post is filled with suggestions and examples, that should please someone on your list. Make a few extras, just in case you forgot to check it twice!
Remember to leave comments on each of these 12 Days of Christmas in July blog hop posts so you can qualify to win some fabric giveaways of Tula Pink’s new holiday line, Holiday Homies, generously donated by Free Spirit Fabrics!!! You have through July 26th to leave comments on all of the 12 Days of Christmas in July blog hop posts. So hopefully, you’re not too far behind in reading and commenting on them.
Please note: Sarah has notified us that she needs to delay the announcement of winners until August 4th due to a family emergency. Winners will be notified by email then. I will be posting a list, too, as soon as I see it.
Here’s an updated picture of the prizes you could be winning if you are commenting on each of the blog posts.

I posted my 12 Days of Christmas in July blog hop post on Monday, July 14, 2017 where I showed how to make a mini quilted stocking and a ring wreath that kids can make. Click here if you are looking for it. My first stocking stuffer reveal happened here and the second stocking stuffer reveal happened here. Here’s a picture recap of what I’ve created for this hop:
Coming soon on Tu-Na Quilts, Travels, and Eats:
- Tuesday, July 25th, 2017 — Tu-Na Quilts: The Fourth and Final Stocking Stuffers Reveal—Does The Fun Have to End? (Do you see the s on the end of Stuffers? I bet you know what that means.)
What I Learned Today:
- My husband reads my posts. I forgot to list what I learned on yesterday’s post. He asked me about it when he was checking his email.
- Work on my posts earlier in the day so I am not tired and forgetful.
- My grandson has a lot of energy. My son, his wife, and my grandson have moved in with us for a few weeks while they wait to get into their new house.
Question: Let’s talk about Christmas yard decorations. How do you decorate the outside of your house or yard or do you enjoy the decorations of others? What’s your favorite outside decoration you’ve seen? My husband hangs lights from the edge of the roof around our gazebo. Then he puts green garland around the rails and ties on pretty red velvet bows. It looks so festive.
We have a street in our town in North Dakota where each year all the houses and trees are lavishly decorated for the holidays. It’s a highlight of the season causing nightly traffic jams as tours cascade down “candy cane lane.” It is beautiful!
However, the residents in our Arizona city decorate their yards quite a bit differently. I posted pics each day from Dec 13-25, 2016 showing these unique Christmas decorations. I also posted pics each day from Dec 26-Jan1 showing how last winter’s weather decorated our North Dakota landscape for the holidays. If you missed any of these, you can find them in the archives on the sidebar, click on December 2016 and scroll through the month. There’s also one on January 1, 2017.
Here’s three of my favorites.
Thanks for all the kind compliments and fun responses to my questions that you’ve shared. I’ve read and appreciated every one. I am just a bit behind in replying. After all, Christmas, even in July, is a hectic season.
Thanks for stopping by and do come again.
Karen, Tu-Na Quilts
Linking to:
- Main Crush Monday at Cooking Up Quilts
- Monday Making at Love Laugh Quilt
- Moving it Forward Monday at Em’s Scrapbag
- Oh, Scrap at Quilting is More Fun than Housework
- Linky Tuesday at Freemotion on the River
- Let’s Bee Social at Sew Fresh Quilts
- Wait Loss Wednesday at The Inquiring Quilter
- Midweek Makers at Quilt Fabrication







This is the dinkiest, tiniest, prettiest, loveliest pin cushion ever. The quilting a beautiful finish, with so few stitches to each side!! I should write a poem for you!!! Definitely one of the projects from the 12 days hop I am going to SAVE for myself. Replying, please take your time, I now know how many minutes it takes to reply to every comment.
LikeLike
Great post Karen, I love the detailed tutorial. I have made many things but never a tiny pincushion, I think it’s about time I did. I love the way you fill the pincushions, I must keep an eye out for a similar container over here.
LikeLike
I love pinwheels, you make it look easy, and your tutorial is wonderfully.
LikeLike
Your little pin cushion is so sweet-the fabric & colors you chose are perfect! My decorations at Christmas include lights around my porch-my Snoopy Christmas flag on my flagpole, and my small reindeer flag in my very small garden. There is a competition every year in our community-but very few participate-and the ones that do are at best minimalistic, compared to those I have seen in Christmas pasts! Thank you for sharing, Susan
LikeLike
We have an evergreen tree at the end of the drive that we have “flung” lights on (it was too tall to do it properly). I think that’s all we do outside. I love that little pincushion! Sweet!
LikeLike
I love your pinwheel pin cushion. I have been saving the corners from the flip and stitch blocks, and I think that I have some that will fit. This would make a great way to use them, and make great gifts too!!
LikeLike
Those are some teeny tiny HSTs! When our youngest was younger we did the lights on the roof. I love seeing the houses that are lit up.
LikeLike
Appreciate the 4 in block tut. The santa hat on the cactus is adorable and funny. We have cut back on Christmas deco because of getting older, the cold the climbing etc. We decorate the deck , the dinner bell and the front porch. Nice and safe, and easy to take down and store.
Hugs
LikeLike
Very cute pin cushion! The backing fabric is almost as fun as the sweetly pieced top. 🙂
LikeLike
Once again, a lovely little gift for the stocking. I wonder if you could use thangles to make those little 1/2 square triangles. But then they wouldn’t be pressed open. Thank you.
LikeLike
That stocking does hold a lot.. such a cute pincushion. I keep saying I want to make a few.
LikeLike
Pingback: Tu-Na Quilts: Ding Dong Merrily on High–Day Eleven of the 12 Days of Christmas in July Blog Hop | Tu-Na Quilts, Travels, and Eats
Hi Karen,
What a fun little pin cushion. It goes so nicely with your other stocking stuffers. I love those fabrics you used, and that little pinwheel just makes me smile. ~smile~ Roseanne
LikeLike
Your tiny pincushion is adorable, and a perfect use for those Temecula mini blocks! I like to make pincushions, too, and I love your idea to put the walnut shells into a mustard bottle for easier pouring. I’ll have to try that!
LikeLike
Talk about some major Ah Ha moments reading your blog. If I never think about or use most of your info (I’m guessing I will actually) there were 2 pieces of info that I could slap my hand on my forehead and say DUH! LOVE the idea of using a mustard bottle to ease the filling of the pin cushions. Never thought of that when I made something like 30 pin cushions a few years ago. And along with that, using a little bit of polyfil to hold the nuts in. LIGHT BULB moment. Thank you so much. I may make more pincushions one day and that will make it so much easier!
LikeLike
Oh dear, those are some tiny blocks and lots of pieces. I love the finished pincushion though.
LikeLike
Wendy I love this pincushion. I can’t imagine doing one with these small pieces. it turned out perfect.
LikeLike
Pingback: Tu-Na Quilts: The Fourth and Final Stocking Stuffers Reveal–Does the Fun Have to End? | Tu-Na Quilts, Travels, and Eats
That is a very sweet pincushion and I really like your fabric choices for it! Thank you for the tutorial. My husband reads my blog too 🙂
-Soma
LikeLike
You have the best stocking stuffers. Thanks for sharing.
LikeLike
I so appreciate your tutorial! Thank you so very much so for sharing and taking the fear out of making mini’s! 🙂
LikeLike
Thanks for the mustard bottle idea. I have struggled with getting the walnuts in the opening and tried making paper funnels. This way the bottle is filled and ready to go. Keep on Quilting.
LikeLike
Pingback: Tu-Na Quilts: Giveaway Winner Annonced | Tu-Na Quilts, Travels, and Eats
Pingback: Tu-Na Quilts: All I Want for Christmas is ___ –Day Seven of the 12 Days of Christmas in July Blog Hop and | Tu-Na Quilts, Travels, and Eats