

Welcome to the seventh block reveal for the Sew Let’s QAL
 This QAL is brought to you by Partners in Design: Where Friends and Fabric Meet.
Presenting: It’s a Pressing Issue

I designed this block with some drawing help from my daughter. She sent me a sketch of an iron on graph paper and then I totally changed it. But I do want to give her credit for helping me see the possibilities. Thanks, Emily!
This block is now available at Tu-Na’s Pattern Shop on Payhip. Just click here to visit the shop and find the iron pattern. It’s an instant download after your purchase. Thanks!
Tips and Tricks to Constructing this Block
- Reading through all the directions on this (or any other pattern) before beginning will mean that you’re less likely to have any problems making this block.
- On the spray head section, you can control the size of the spray head by how you trim the block. I’ve made the pieces extra large so you can play with the block to determine just how big or little you want the spray head to be.


Some irons seem to have large spray heads and some smaller.

There’s the cacti in bloom fabric!
- I thought I’d take this time to discuss some very important pressing matters. I’ll take a closer look at the correct ways I’ve learned to press and iron because pressing and ironing are two different methods of removing wrinkles from cloth.
Tu-Na’s Tried and True
Easy Guide to Pressing Matters
“My second favorite household chore is ironing. My first being hitting my head on the top bunk bed until I faint.” Erma Bombeck
“I’m eighteen years behind in my ironing.” Phyllis Diller
Ironing and Pressing are Completely Different
Let’s get this straight right away. Ironing is done by sliding the iron back and forth across the fabric. I iron my fabric before cutting and I iron Tu-Na Helper’s Hawaiian shirts.
Pressing is done by lifting the hot iron and setting it down, waiting a few seconds and repeating the process. I press my blocks during and after construction. Pressing helps avoid stretching the fabrics and pieces out of shape that ironing can do.
Buying the right iron:
I’ve heard from a quilt shop owner (Madonna at Mad B’s Quilt and Sew) that it really doesn’t matter what brand of iron you use; It’s more important that you use it correctly. So if you really want to spend a hundred dollars or more on an iron, go right ahead. If you’d prefer to use one that’s easier on the budget, go right ahead. Just be sure to plug it in, turn it on to the correct temperature, and don’t iron over the cord.
In the beginning—before pieces are even cut:
I spray a fine mist of water on my fabric and scrunch it up.

After 5-10 minutes of allowing the water to soak into the fibers, I am ready to start. After smoothing the fabric with my hand, I iron going with the lengthwise grain of fabric to keep stretching to a minimum.
To find the lengthwise grain, look for the selvage and follow the direction of it while sliding your iron back and forth (in the directions of the arrow pictured below).
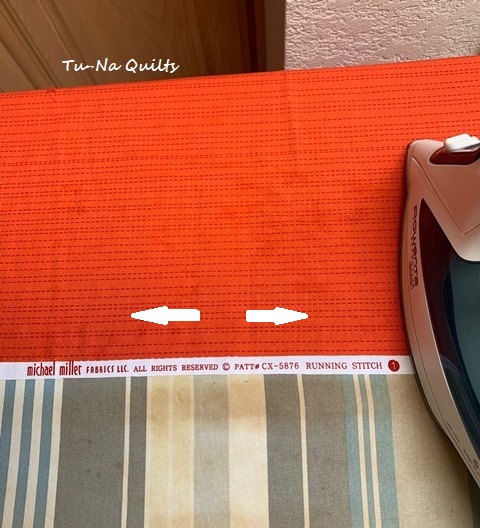
If you don’t have a selvage edge because you’ve cut it off or it didn’t have one (usually fat quarters are missing a selvage), don’t despair. You can find it simply by holding one side of your fabric in one hand and the opposite side in the other hand and giving it a gentle pull. If there is almost no give when you’re pulling, then you’ve found the lengthwise grain. If you’re pulling on the crosswise grain, you’ll feel a slight stretch in the fabric. If you’re pulling on the bias (one corner diagonally from the other), there’s a lot of stretch. Give it a try to see the difference. Sewing and ironing pieces that have an exposed bias edge need to be handled carefully; small pieces can stretch out of shape.
To steam or not to steam?
That is a good question! I do not use water in my iron. I’ve had too many irons that leak rusty water or spurt yellow water and ruin fabric—most of the time it happens on my favorite piece or on a white background.
If I find I need more than a hot iron to smooth the wrinkles, I spritz on water from a sprayer bottle, smooth it with my hand, let it set a few minutes and then continue with the ironing or pressing.
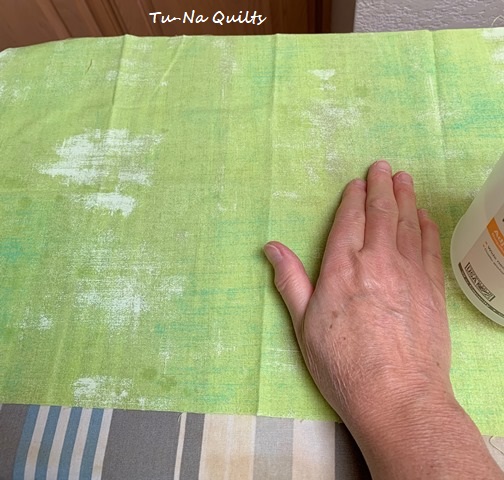
It’s amazing how just spritzing fabric with water and smoothing the fabric by hand seems to eliminate a lot of wrinkles.
The other reason I don’t use steam is that I’ve found that it seems to make fabric shrink. This is one reason why some blocks come up short. I’ve seen blocks continue to shrink after multiple steam pressings. I buy good quality quilt shop fabric and this has happened to me.
What comes next?
If I am cutting small pieces (anything 2 1/2 inches or less) or if I want to ensure my fabric won’t be stretching out of shape when I sew it (such as sewing any pieces that are cut on the bias) or if the fabric needs more body and stiffness, I spray the fabric with a good starch such as Best Press.
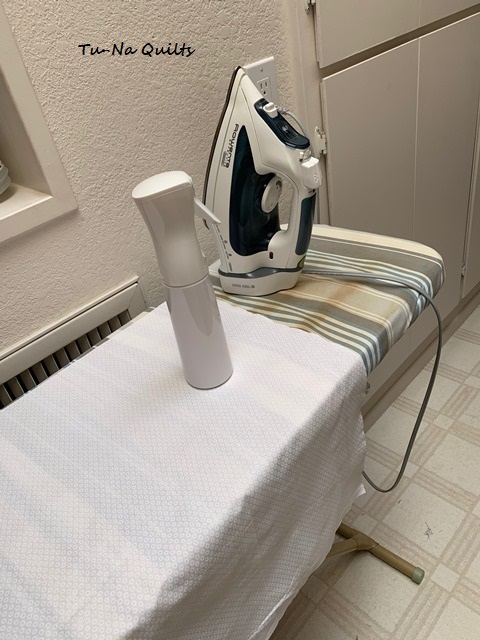
I keep Best Press in this wonderful spray bottle. It sprays a very fine, even mist.
Then I leave it until it’s dry. Madonna from Mad B’s Quilt and Sew says that if you hear a sizzle during the ironing process, you’ve successfully applied the starch onto the bottom of your iron. So spray and go do something else. It should be dry before you iron. Yes, it can set overnight.
This is all the starching I do. One good spray of starch like this before cutting should be all that is needed to ensure nice, flat blocks. Two Important points to remember when paper piecing: Never starch or spray water during the paper piecing process because inks can run and paper becomes soggy. Always press on the fabric side NEVER on the paper side.
Some quilters, starch every piece of fabric before they cut. It becomes a habit.
During the construction:
I press seams (either open or to the side according to pattern directions) as I complete a seam. However, first I set the seam by setting the hot iron on my closed seam for a couple of seconds.

Then I finger press the seam open or to the side before finally pressing with the iron. Then I flip the unit over and press it on the other side. If you find your blocks are smaller than they should be, one reason might be there is a bit of fabric at the fold on the right side of the block by the seam. If this is the case, you’ll need to practice your pressing skill. It’s a good quilting skill to have.
The quest to making the flat flatter:
Sometimes, blocks or seams just won’t behave. To help that situation, I use a wooden clapper to help seams lie flat. It’s more than just a block of wood. As soon as I’ve finished pressing the seam, I lay down the clapper and leave it for several minutes while I work on another part of my project.

I bought this well-sanded and smooth clapper from one of my AZ’s group’s fiber art fundraisers.
I also use a wool pressing mat when I press my block pieces. Caution: Do not spray starch on your wool pressing mat as it can scorch the mat. Supposedly, a wool mat can’t burn but I know from experience that this isn’t always the case.

There are other pressing aids such as the Wooly Felted Wonder Pressing Bar that I have yet to try but sounds like it would be helpful to press seams open better. Maybe just a round wooden dowel would work too. I’ll have to ask Tu-Na Helper if he can find one in the woodshop so I can give it a try.
I always use a Non-stick pressing sheet (bought at JoAnn’s) to both cover and put under my applique pieces to prevent any stray fusible gunk from getting on my iron (or ironing surface). But, sometimes, it still happens and then it’s time to…
Clean the iron:
I use an iron cleaner sheet to clean my iron. I found it at my local quilt shop. It’s easy to use and works wonders. A clean iron works best!

It’s easy to use; just follow the instructions.
Are you wanting to learn more about these pressing matters?
Check out this video of Kimberly from The Fat Quarter Shop to find out more.
Frédérique of Quilting Patchwork Applique has a post here with more info on ironing and pressing. She also discusses ironing boards and tables.
Bradie of Sparrow Quilt Co. shares info on this video regarding wool pressing mats and why she likes to use steam when ironing and pressing.
See These Hosts for More Construction Tips
Look for bi-weekly inspiration from these bloggers.
Karen @ Tu-Na Quilts, Travels, and Eats — The designer of this block.
In addition to those listed above, look for inspiration from these bloggers during:
Segment 2: May 21st to July 16th
Jennifer Fulton @ The Inquiring Quilter
Quilt Hosts
Look for bi-weekly inspiration from these bloggers as they turn their blocks into a quilt.
Join this QAL
You can join in anytime. Every other Tuesday, a new block will be released until all 13 blocks have been released. You can find the full schedule on my post here. This QAL will be divided into three segments. Segment one consisted of 5 blocks. Segments two and three will each have four blocks.
Share a picture of your block on our Facebook page, or on Instagram with the hashtag #SewLetsQAL. We want to see them. A prize will be awarded at the end of each segment.
Segment 1: March 12th to May 21st
- March 12th – Block 1: Sandra @ Sandra Healy Designs — Find Block One There
- March 26th – Block 2: April @ JANDA Bend Quilts —Find Block Two There
- April 9th – Block 3: Sherry @ Powered by Quilting — Find Block Three There
- April 23rd – Block 4: Bobbi @ Snowy Days Quilting — Find Block Four There
- May 7th – Block 5: Abbie @ Sparkle On! and Segment Project Suggestions
- May 21st – Segment 1 Prize Winner Announced! Check our Facebook page for the announcement. (Update: Congratulations to Ethel Brake)
Segment 2: May 21st to July 15th
- May 21st- Block 6: Jennifer @ The Inquiring Quilter — Find Block 6 There
- June 4th – Block 7: Karen @ Tu-Na Quilts, Travels, and Eats — Find Block 7 There
- June 18th – Block 8: Sherry Shish @ Powered by Quilting
- July 2nd – Block 9: Kathleen McCormick @ Kathleen McMusing
- July 15th at 11:59pm EDT – Last day to enter for the giveaway. Post a picture of all 4 blocks either on the linky party (find it on any of the blogs), Partners in Design Facebook page, or Instagram with the hashtag #SewLetsQAL.
- July 16th – Segment 2 Prize Winner Announced!
Block patterns will be free from the designers and available on their blogs until the date of the Grand Prize announcement September 24th, 2019.
Enter to Win
Entering to win the prizes below is as easy as 1, 2, 3.
- Everyone (You must be 18 to be able to enter to win prizes) gets to participate because International entries are welcome! You do NOT need to have a blog to enter.
- Make all of the blocks in this segment provided to you free of charge for this event. Use your own fabrics and embellish them as you like. If entering the giveaway, the blocks should definitely be recognizable as made from these free patterns. Take one picture with all of them included.
- Post a picture of all of your blocks by 11:59 PM EST, July 15th 2019 either on the Facebook page, or on Instagram with the hashtag #SewLetsQAL, or on the hosts blog Linky party at the end of each segment. You are welcome to post a picture on each of the sources but it will only count as one entry.
Segment 2: Prizes and Sponsors
- A Warm 100 queen size batting from the Warm Company.
- A fat quarter selection from Dear Stella
- Three printed table runner patterns from Shabby Fabrics, the Vintage Series
AND
A free PDF pattern of your choice from each of these Partners in Design: Powdered by Quilting (up to $10) and The Inquiring Quilter
Choices!!!
You choose what you want to make: A quilt or several smaller projects. The sewing machine, revealed in segment one, is the only block that will be large. The rest will be 12.5″ unfinished. We have several hosts who will offer suggestions as to what you can do with your blocks if you don’t want to make a quilt.
Not sure what to do? Just start making the blocks and decide along the way. A grand prize will be offered for a completed (but it doesn’t have to be quilted) quilt top or several projects that use all of the 13 blocks.
I’ll be making several projects for my sewing room. I completed a mini quilt using one of the blocks from the first segment. You can read about it here. The remaining blocks from the first segment as well as a couple from the third segment will be used for a sewing machine cover. So I really can’t show you this project until those blocks have been revealed. Plus it gives me some extra time to complete it.
You will notice that my fabric has changed for this segment. I have other plans for the blocks from this second segment.
Don’t Miss Out on My Previous Sew Let’s QAL Posts
Segment 1:
Tu-Na Quilts: Sew Let’s QAL – Introduction
Tu-Na Quilts: On Pins and Needles – A look at my fabric selection. It varies with each segment of the QAL.
Tu-Na Quilts: Sew Let’s QAL Block 1— Sewing Machine
Tu-Na Quilts: Sew Let’s QAL Block 2 — Quilt Along Mug Block
Tu-Na Quilts: Sew Let’s QAL Block 3 — Ruler
Tu-Na Quilts: Sew Let’s QAL Block 4 — Spinning Spools and Thread Tales
Tu-Na Quilts: Sew Let’s QAL Block 5 — Quilt Shop
Tu-Na Quilts: Segment One Wrap-Up and Project Idea


Segment 2:
Tu-Na Quilts: Sew Let’s QAL Block 6 — Binding Clips

What I Learned Today:
- Phyllis Diller and Erma Bombeck must have recently been in my laundry room and seen the heap of Hawaiian shirts waiting for ironing.
- I am so glad that Tu-Na Helper and I sold a set of bunk beds!! However, there is still one set remaining.
- Some features of an iron are iconic. I find it interesting that I included a spray head and water spray on my iron pattern even though I don’t use that feature on my iron. I didn’t think about it until now.
- I’d sure like to find a good, heavy, vintage iron that works! One that doesn’t have the steam feature.
- No post would be complete without a few cactus pictures.
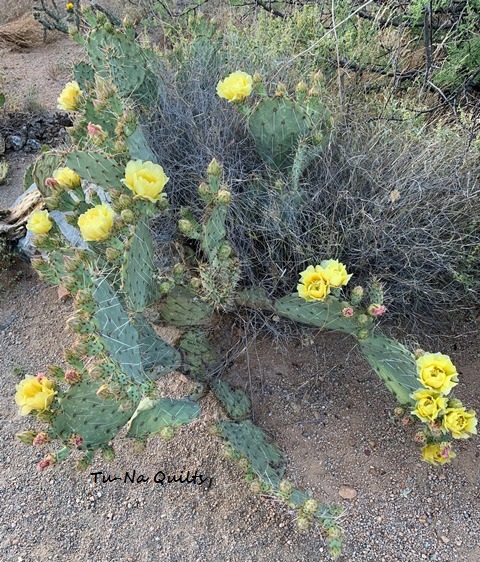

I actually got quite close to this cactus! I was lucky not to get stuck.

I can’t seem to get enough of seeing the blooming saguaros!
- Closing up the house in AZ is a lot of work some of which, I think, is unnecessary and some is really difficult to watch.
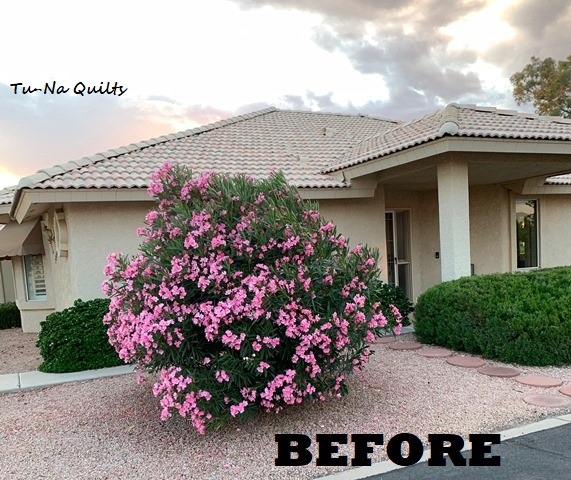


Now tell me. Should I let him in after what he did?
Questions: Do you use a hot and steamy iron or do you prefer a dry iron? I never use water in mine. I used to with my old iron until it spit and sputtered rusty water all over my white background.
I am not affiliated at this time with any of the items, products, services, or shops that I picture or talk about here on Tu-Na Quilts, Travels, and Eats. I just happen to like and use them.
Linking to:
Main Crush Monday at Cooking Up Quilts
Monday Making at Love Laugh Quilt
Let’s Bee Social at Sew Fresh Quilts
Midweek Makers at Quilt Fabrication
Can I Get a Whoop Whoop? at Confessions of a Fabric Addict
Finished or Not Friday at Busy Hands Quilt
Thanks for stopping by and do come again.
Karen, Tu-Na Quilts

This is a really cute block, but I wasn’t able to get to the pattern. The area wasn’t clickable.
My iron is very important to me. I used to use water in my iron, but I don’t do that anymore. I didn’t realize that using water could shrink my piecing. Last year I got a clapper, and I am so happy with how well it flattens my seams. I am also using a wool pressing mat, partly to cover up the scorched area on my ironing board cover!
The cactus flowers are so interesting. I find the saguaro buds to be fascinating. You wouldn’t expect such pretty flowers to appear from such odd lumps.
Have a safe trip north.
LikeLike
Never mind about not being able to get the pattern. I was trying to click on the red type and missed the spot above it where it worked. Sorry about that!
LikeLike
Hi Leslie – I too am having trouble getting the pattern. I cannot see the spot you mean.
LikeLike
Pingback: “Sew, Let’s Quilt Along” Block 7 Release! | Sparkle On!
Cute block! I have such plans for it! Your pressing tips are true and right on the money. Definitely worth a read if you are having trouble sewing up blocks accurately!
LikeLike
Pingback: Sew Let's Quilt Along Block 7 - SandyStar Designs
Pingback: Sew Let’s QAL Block 7! – Powered by Quilting
Hi Karen! I always enjoy the cacti photos – so very pretty. Great tips you shared about ironing vs. pressing. I never heard that about starch and the sizzle. It does make sense though! This is a really fun and cute block. ~smile~ Roseanne
LikeLike
I agree that this is a cute block! I’ve been enjoying seeing each block, even though I’m not making them (yet). I don’t put water in my iron for the same reasons. I did learn a few things though — like waiting after I use starch. Hmm. My wool pressing mat is changing color in the spot that I regularly use. I think perhaps my iron runs a little too hot. Good tips in this post, Karen!
LikeLike
Thank you for a wonderful block about something that is so necessary to quilting! Your ironing and pressing thoughts are also very welcome. I do steam, but I have it set at a low steam setting, and don’t notice either shrinkage or stretching – well maybe stretching once in a while on certain thinner fabrics. It usually isn’t germane to my design, though. This is a great block!
LikeLike
Cute block! I d like to use steam. Thanks for your ironing and pressing tips!
LikeLike
Great block and lots of terrific pressing information!
LikeLike
What a fun block! You really went to town on your pressing instructions! I am beginning to agree about the lack of water in an iron, however, I feel like some irons don’t get so hot unless they have the steam….what do you think?
LikeLike
Great block and tips for pressing! I always wind up with starch on my iron, I will change the way I starch.
LikeLike
I think you hit on every pressing/ironing tip there is! Thank you for that. It’s nice to learn something new and refresh what we already know!
LikeLike
Oh my gosh, Karen — where to even begin?! Your iron pattern is adorable. You managed to put so much personality into an inanimate object with which we quilters are so intimately acquainted! And what a great idea to include all of your best practices, tips and tricks for ironing with the iron-themed block. I also love your little binder clips block, and the glorious colors you’re using — and the reference to Erma Bombeck and Phyllis Diller! I can totally relate to the marital conflict that followed the Shrub Assassination Incident. My husband took it upon himself to hack down a full-grown crape myrtle tree that I LOVED just because the neighbors had hired some nitwit landscaper who was “topping” THEIR crape myrtles. I felt like he’d killed the family dog or something; that’s how upset I was, and it took years for that tree to recover just a shadow of its former glory. Are you closing up the AZ house to put it on the market or just seasonally, because you spend your summers in a more moderate climate?
LikeLike
I quite enjoy ironing. What i really hate is putting away the clothes. I could happily do all the ironing and then leave it piled up on a chair! My husband hovers behind me as I iron, he can’t wait to get his clothes hung up. Opposites attract I suppose.
LikeLike
What’s an iron?…JK…Looks like I learned something new today!
LikeLike
Karen, that block is soooo cute! Using rick-rack for the cord is so cute. Thanks for the pressing tips – I’m usually too impatient to wait for my starch to dry and always hear the sizzle. Guess I need to get me some of those iron cleaning sheets! 🙂 I have one of those misting spray bottles that I don’t use so I’m gonna put some Best Press in it and try it out.
LikeLike
Great pressing tips Karen. I was taught to set the seam first but I didn’t know to let the starch dry before pressing, I will remember that one. I only recently invested in a wool pressing mat, wow! They may bee expensive but they make pressing so much easier and no distortion too, wonderful.
LikeLike
Pingback: Lets Sew Quilt Along | LC's Cottage
Pingback: Tu-Na Quilts: Sew Let’s QAL Block 8 – Pin Cushion | Tu-Na Quilts, Travels, and Eats
Pingback: Tu-Na Quilts: Sew Let’s QAL Block 9 – In Stitches | Tu-Na Quilts, Travels, and Eats
Pingback: Tu-Na Quilts: Sew Let’s QAL Block 10 – Buttons | Tu-Na Quilts, Travels, and Eats
Pingback: Tu-Na Quilts: Sew Let’s QAL Block 11 – By the Bolt | Tu-Na Quilts, Travels, and Eats
Pingback: Tu-Na Quilts: Sew Let’s QAL Block 12 – Rotary Cutter | Tu-Na Quilts, Travels, and Eats
Pingback: Tu-Na Quilts: Sew Let’s QAL Block 12 – Who’s Got the Thimble? | Tu-Na Quilts, Travels, and Eats
Pingback: Tu-Na Quilts: Announcing the Next Quilt-a-Long with Partners in Design | Tu-Na Quilts, Travels, and Eats
Pingback: Tu-Na Quilts: QAL by the Sea Block 1-She Sews Seashells by the Seashore | Tu-Na Quilts, Travels, and Eats
Pingback: Tu-Na Quilts: QAL by the Sea Block 6 | Tu-Na Quilts, Travels, and Eats
Pingback: Tu-Na Quilts: Destination QAL Block One- Canyon Block | Tu-Na Quilts, Travels, and Eats
Pingback: Tu-Na Quilts: Destination QAL Block 8 | Tu-Na Quilts, Travels, and Eats