Digging out after the storm. There are two cars under there.

And the fun begins.
Digging out after the storm. There are two cars under there.
And the fun begins.

No red poppies now. This was taken just before the storm. Tomorrow I will post after the storm.

“Closed for the Season”
Yes, we are now back in North Dakota for a short visit; it seemed like a good idea when we booked our tickets in July. We are in the midst of another North Dakota blizzard which started on Christmas Day and will continue into Monday. Many of the roads are closed now so we’ll be spending lots of time together. Good thing I stocked up with lots of food before the snow started. The fun will continue another day or two with games including prizes.
Thank you so very much for all the warm Christmas greetings and other comments you’ve left for me. I’ve enjoyed reading them all and will be able to respond to them soon.
What I Learned Today:
Question: Who did you share Christmas Day with?

Visitors from 45 countries have stopped by Tu-Na Quilts, Travels, and Eats and have left approximately 600 comments. I’ve replied to almost all of them, except for the ones caught in my spam filter. That’s taken a bit of work and my husband can vouch for the fact that I’ve spent a good chunk of time sitting at my computer. I’m flattered to have almost 200 followers already. Those are pretty good statistics considering this blog is only eight months old.

Cheryl at Meadow Mist Designs is hosting a special linky party for bloggers to post their five top posts. So here’s my year-end review highlighting some of the top posts.

Find out who Tu-Na is.
I introduced myself on my very first post Tu-Na? and explained the significance of that name. I have my five year old grandson to thank for that inspiration. It was a real “light-bulb” moment.
2. Tu-Na Travels: So Where’s the “Loot”?

Every pirate keeps their loot in a treasure chest. I guess that makes me a quilting pirate and this was my treasure chest.
This summer, my husband and I traveled around the entire state of Minnesota visiting and shopping at 72 quilt shops on the annual Quilt MN Shop Hop. I wrote about our adventures such as going for a sailboat ride and some of the delicious meals we ate. Each day I featured a quilt shop (two shops on Day Six of the hop) on this blog. While I could have chosen any of those posts (after all I met some very nice shop owners and staff who were more than just “Minnesota nice”), I chose Tu-Na Travels: So Where’s the “Loot”? because it was very fun to write. I could think of no better way to introduce all the stuff I bought on the hop than pretending to be a pirate. After all, some of it was such good buys that I couldn’t believe my good fortune. I can honestly tell you that I was rolling on the floor laughing out loud (for real) as I wrote and then read aloud this post. My husband even had to come to my desk to see why I was laughing so hard.
3. Tu-Na Travels: Tu-Na Helper’s Side of the 2016 Quilt MN Shop Hop

This pic was one of the first ones we took using our selfie stick. I think we need practice with it.
My husband guest wrote a post Tu-Na Travels: Tu-Na Helper’s Side of the 2016 Quilt MN Shop Hop telling his impressions of the trip and why he went along on it. Yes, he was lovingly nicknamed Tu-Na Helper since I put him in charge of photographing the shops while I interviewed and shopped.
4. Tu-Na Quilts: Presenting Anne’s Flower

Don’t let the curved seam on the stem scare you from making this block. It’s rather easy. This block uses a method I called “Piecelique” which is a combination of piecing and applique. I wanted to design a block that was pieced and kept the applique to a minimum.
Anne’s Flower was my first block that I designed. It is available at Tu-Na’s Pattern Shop on Payhip here.
5. Tu-Na Eats: Apples, Apples, and More Apples

I use an older point-and-shoot digital camera, but it takes really good pics.
Life was very busy this fall as we tended to an abundant apple crop. The post Tu-Na Eats: Apples, Apples, and More Apples gives you an idea of what we did with all the apples that we harvested. By the way, we are still eating apples and our oranges are now starting to turn color.
What I Learned Today:
Question: Tell me about your greatest accomplishment or memorable moment from this year. Here’s your chance to “toot your own horn,” too.
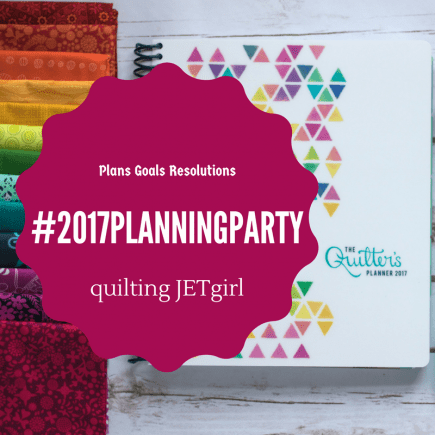
Yvonne at Quilting Jetgirl is having a party!

I want to come too! But I have to satisfy a couple of requirements first: 1. Think about what I want to accomplish with my blog and quilting next year. 2. Write about those goals. 3. Link up to the party. 4. Work on my goals. The first three are easy; the fourth finds life sometimes getting in the way.
Tu-Na’s 2017 Quilting and Blogging Goals
My Blogging Goals for 2017
My Quilting Goals for 2017

Although this pic doesn’t show it, the top is now finished. I changed the bear from the pattern and it took me a bit to figure it out. I just have to put the back together, quilt, and bind it. Then I’ll write a post about it, too.
bind my nine-patch (only been waiting 2 years because it’s for me and I let other projects take precedence), white/black and yellow using The Candy Store pattern, Tu-Na Helper’s much deserved quilt using the Quilt MN Shop Hop fabric, my grandson’s minecraft quilt, and 1930s repro applecore.

This 2016 Quilt MN Shop Hop fabric will be the focal fabric for Tu-Na Helper’s quilt. He’s always talking about going fishing. I’ve seen sneak peaks of the 2017 Quilt MN fabric line and it also contains fish. I wonder if that will be enough enticement for Tu-Na Helper to come along on the hop again.
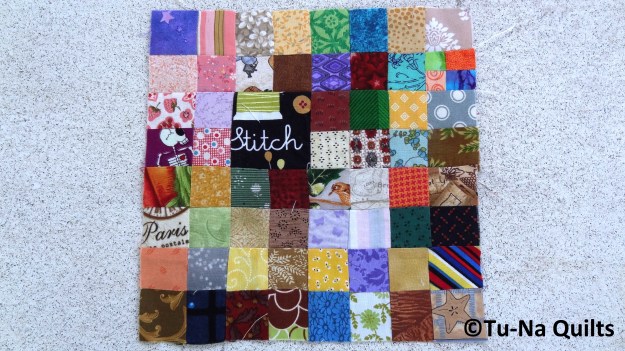
I have cut lots of 1.5″ squares and sewn together lots of them into twos and some into fours. But this is the only piece sewn together in an 8.5″ block. There will be one 2″ piece and 4 half-inch (finished pieces) within each 8″ finished square. But it’s time to get on with this project.
That’s a good start on my list of goals. It’ll help keep me focused.
What I Learned Today:
Question: What’s your goal for today? Will you accomplish it?
It isn’t the holidays without some of Mom’s Cranberry Pineapple Sauce.

I made some for Thanksgiving and I imagine I’ll be making more for Christmas. In fact, it’s the only cranberry sauce recipe that I make anymore. I’ve tried a bunch of different recipes but I seem to always come back to this one. So I thought you might like to make it, too.

Fresh plump red cranberries say Thanksgiving and Christmas are coming. I usually buy several extra bags to throw in the freezer to use during the year. Funny thing is that we found about 12 packages when we cleaned out the freezer this fall. Rinse the fresh or frozen cranberries.
Seems like this time of year the days go by so fast and there is so much to do. This sauce cooks up quickly and stays for several days in the fridge.

Usually, I buy crushed pineapple for this recipe but I accidently grabbed some tidbits instead. “No problem,” said the food chopper as it quickly turned those tidbits into tiny little pieces. Like I always told my kids when they were little, “There’s always more than one way to solve a problem.” Since I only buy pineapple packed in it’s juice, I drain the juice and use it as part of the liquid called for in the recipe. Once the pineapple is drained, I add water to the measuring cup to make the two cups needed.
It even tastes better if you make it a day or two ahead.

Boil the juice, water, and sugar for 5 minutes. I use a large kettle and stay close by.

Add the cranberries and boil without stirring until all the skins are popped open (about 5 minutes). That popping is like music to my ears. In fact, when I no longer hear the popping sounds, it tells me it’s done.

I usually can’t help myself and stir it once or twice to check on the bottom layers. Besides that, I find stirring food at the stove to be comforting.

Once all the skins are popped, remove from the heat and add in the pineapple. Chill for several hours before serving. It can even be made a day ahead of serving.
Here’s the recipe. Let me know if you make it.
Mom’s Cranberry Pineapple Sauce
Drain the pineapple into a two cup measuring cup. Add enough water to make a total of 2 cups of liquid. Combine the sugar, pineapple juice/water in a large kettle. Bring to a boil and boil for 5 minutes. Add the rinsed cranberries and boil without stirring until all the skins are popped, about 5 minutes. Remove from heat and add the pineapple, stirring well. Chill in refrigerator several hours before serving.

I like it so well that I wouldn’t have to bother eating anything else for the meal.
What I Learned Today:
Question: What is your favorite holiday food to make or it just wouldn’t seem like the holidays?

My oldest son was about three when we started making these cookies. That first year, we had a Christmas party with several of his little friends and all the kids used paintbrushes to paint the cut out Christmas shapes.

The kids gather around the table painting and having fun. This pic was taken a couple of years ago although it feels just like last year. The cookies are painted before they are baked. When I first started this tradition, I bought a package of paintbrushes that I keep in the kitchen to be used only for this project.
The kids were proud of their accomplishments, even though those made by the younger ones contained many holes from pushing the brush too hard.

The “paint” is made with egg yolks, water, and food coloring gel (not the liquid kind). These cookies pictured here are done and ready to be transferred to a cookie sheet and lightly sprinkled with sugar before baking.
A family tradition was begun. Through the years, the kids’ painting skills grew and we continued to make and paint these cookies at Christmas time. Eventually daughter-in-laws and a son-in-law were added to the family and the cookies took on a real artistic flair.

Close-up before baking

After baking

Before baking

After baking
There were a few years that time got away from us finding us rolling and painting them on New Year’s Day. A few years we even forgot. But for the most part, it’s been a yearly tradition in our family. While they look complicated to make, they are very easy.

Don’t these look too pretty to eat! I think they look like stained glass.
This same idea makes really pretty Easter cookies using bunny, butterfly, flower, carrot, and an oval (for an egg) cookie cutters. I hope you give them a try. If you do, let me know what you thought and how yours turned out.

You don’t need artistic ability to paint these cookies. Even a few simple details make them look festive.
Painted Cookies Recipe
Make your favorite rolled cookie dough or use store-bought cookie dough. I’ve included my all-time favorite rolled cookie dough recipe—I use none other when needing a rolled cookie dough.
Roll the cookies to 1/8-1/4″ thick. (I roll them to about 3/16″ or so as I like a thicker cookie). After years of practice, I don’t measure anymore but just guess.) Cut out the cookie shapes using cookie cutters of your choosing. To make rolling out the dough easier, I wipe my counter with a damp cloth and immediately sprinkle a fine dusting of flour over it.
Mix the egg yolk paint using the recipe below. Using a fine paint brush, paint each cookie as you desire. Let one color dry before adding another color on top of it—it doesn’t take more than a few minutes (this is so that the colors don’t mix or run). Sprinkle lightly with sugar (optional) and bake at 350° for 8 minutes. Transfer to a cooling rack. Enjoy!
Rolled Cookie Dough
Ingredients:
Directions: Mix flour, butter, baking soda, baking powder and salt with a pastry blender or fork (like you would if you were making pie crust). In another bowl, beat eggs with a mixer, add sugar and blend well. Mix in vanilla. Stir egg mixture into flour mixture by hand. Roll into a ball and refrigerate at least an hour for easier rolling. If refrigerating overnight, remove from refrigerator 2 hours before using.
Egg Yolk Paint
Ingredients:
Directions: Mix egg yolks and water. Divide into small containers like miniature muffin pans or liquid medicine cups. Add paste/gel colors and stir well. Use a new paint brush for each color. You don’t need a lot of “paint” as it goes a long way.
Virtual Cookie Exchange Blog Hop List

Here’s the list and links to other cookie bakers waiting to share their special treats and recipes with you. Be sure to click on the first link below to visit Carol at Just Let Me Quilt to enter the giveaway. Thank you Carol for hosting this virtual cookie exchange.
December 5
Tu-Na Quilts, Travels, and Eats Thanks for joining me here.
December 6
December 7
Rosemary’s Recipe – posted at Just Let Me Quilt
December 8
Thanks for stopping by. If this is your first time here, welcome to my blog where I write about the things I love: quilting, traveling, and eating—well actually cooking and baking but that doesn’t sound as good. Click here to find out more about me. I started my blog in April 2016 and wrote an introductory post for the New Quilt Bloggers Hop that you can find here. This summer my husband and I spent 9 days traveling around Minnesota visiting 72 quilt shops and I wrote many posts about those adventures. You’ll find the first post here. But don’t stop there, continue to check out the other posts about the quilt hop so you don’t miss all the fun, frivolity, and loot I acquired on that trip; plus you’ll get to visit some very cool quilt shops and see some spectacular pics of the trip.
What I Learned Today:
Question: What is your traditional family food/dessert/treat for the holidays?
Linking to:
Beth at Cooking Up Quilts for Main Crush Monday (button on the sidebar)
Beth at Love Laugh Quilt for Monday Making (button on the sidebar)
Lorna at Sew Fresh Quilts for Let’s Bee Social (button on the sidebar)
Sarah at Confessions of a Fabric Addict for Can I Get A Whoop Whoop? (button on the sidebar)
Here’s some of the quilts I am particularly proud of that I’ve made in the past. I’m linking to Whims and Fancies Trunk Show which showcases quilts. You are invited to check them out (click on this button below) after you get done reading here that is.
This summer I made a plus quilt for our exchange daughter (blog post still coming about it) and gifted it to her in August. You can read more about the quilt by clicking here.

I made two Little House Quilts using Amy Friend’s idea and many of her free patterns found on her During Quite Time Blog. I made the quilt below for my friend’s granddaughter. Click here to read the story of why I made it and for the links to the free patterns.
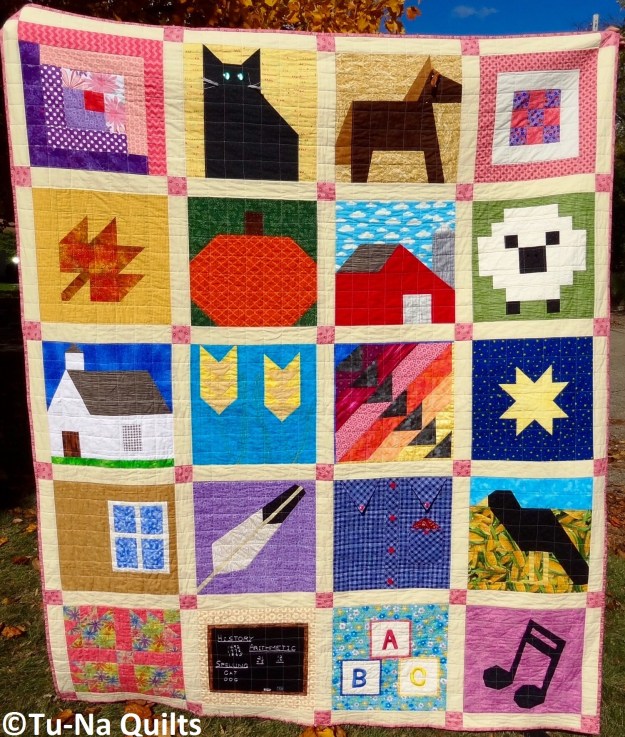
I made the quilt below for my grandson. I designed the covered wagon block. Close-up pics as well as my post explaining why I chose the blocks I did and links to the patterns (except for the covered wagon) can be found by clicking here.

I like this side by side pic so you can see the differences of these two quilts. The one on the left is definitely more girly and rightfully so since it went to a little girl.


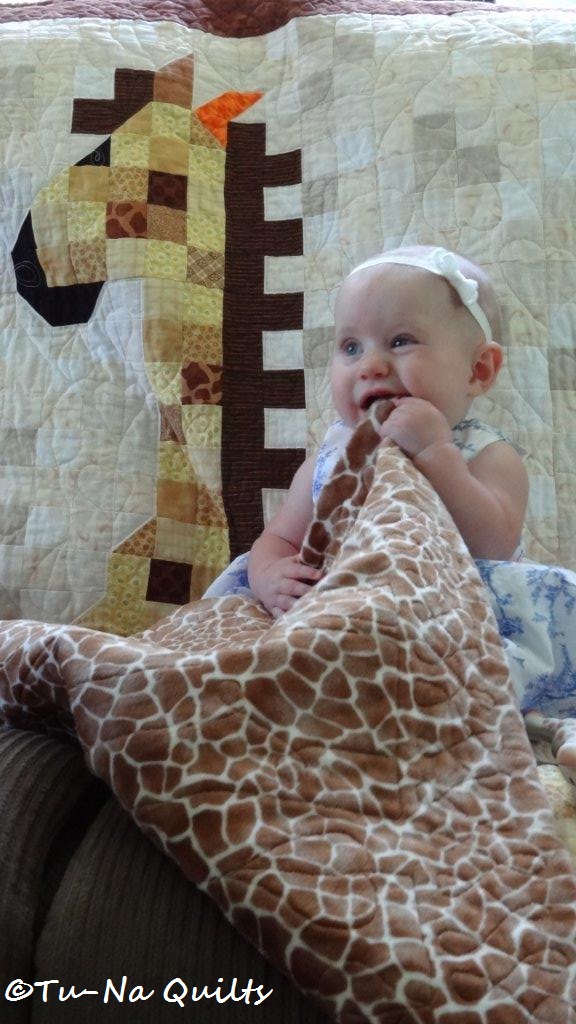
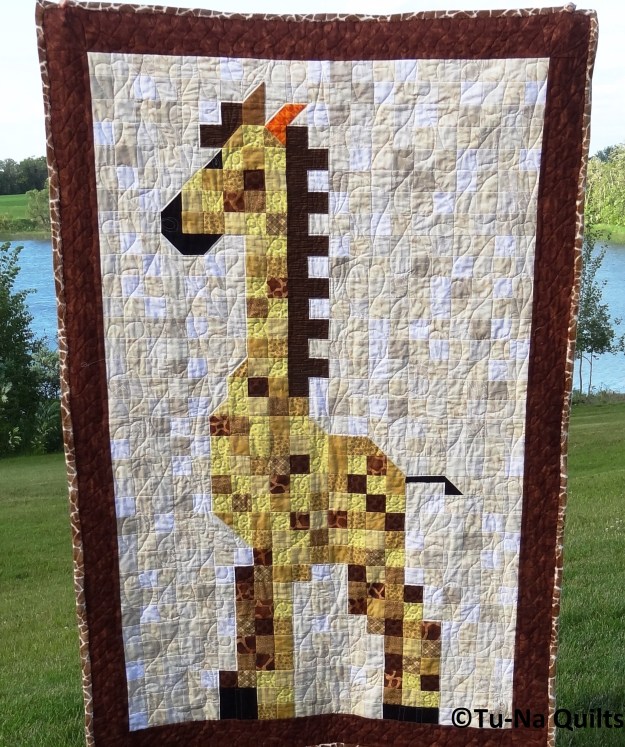
I also made two pixelated giraffe quilts. This first one was for my granddaughter. There are 714 squares that finish at 1.5 inches of quilty cuteness here.
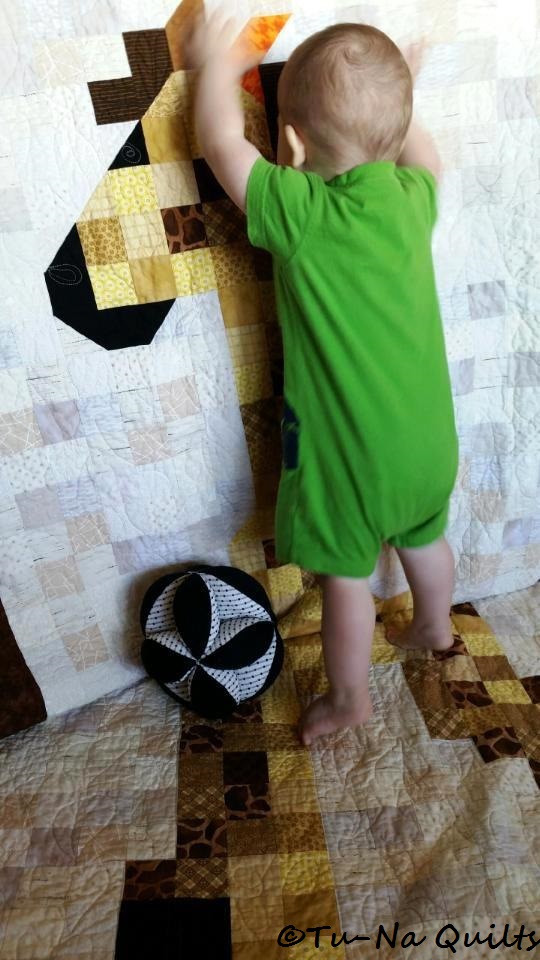
Nothing warmed my heart more than when she gave her taste of approval.

I used Minky for the back of both giraffe quilts. They were my first and second attempts at free-motion quilting on my home sewing machine and I loved it. My grandson’s quilt was a bit bigger with 714 squares finishing at two inches. If you look close you can see how I added an eyeball and nostrils when I quilted it. I think he was a bit excited to get it, too.
I have more quilts to show and share but time is running out to get this submitted. I hope I’ve whetted your appetite and that you’ll come back to read more.
Thanks for visiting. If this is your first visit here, welcome to my blog. You can read more about me here and here. If you’ve enjoyed what you’ve read and want to keep up with my adventures, I invite you to follow me by one of the methods found on my sidebar.
What I Learned Today:
Question: What have you been up to lately? For me, I’ve just arrived at my winter home and am busy unpacking, restocking the pantry and refrigerator, and getting reacquainted with the area. I often joke about us being back again at our cabin at winter camp for seniors. First item of business this week is buying a sewing machine since I left mine at my other house. Advice and recommendations are definitely appreciated.

“If you don’t want to rip, you shouldn’t be sewing.”
Over the last couple of years, my mom and I’ve spent a lot of time quilting together. According to my husband, it seems like that’s all I’ve been doing. However, I know years from now when I look back on our time together I will say it wasn’t enough.

We are working on Sew Fresh Quilt’s Modernitional Bear Paw Quilt together. Mom contributed some fabrics.
During these quilting sessions, I write down mom’s words of quilting wisdom. My plan is to share these bits of wisdom with you from time to time in a series that I’ll call “My Mama Always Says..“ I hope you will find them interesting and helpful, too.

Welcome to
My Mama Always Says..:
Where years of experience and bits of quilting wisdom guide me on my quilting journey.
So just why would mom say that I shouldn’t be sewing if I don’t want to rip out my mistakes? I don’t know about you but I make a lot of sewing mistakes. Maybe it’s because I am a perfectionist or maybe it’s because I just want it to look nice. Then again it might be that I just want it to look right or maybe it’s because I am still learning. Nonetheless, I’ve come to the realization that nothing is always perfect. So I’ve begun to hold my seam or block at arm’s length. If I don’t notice that the seams don’t meet just right from that distance, then it’s good enough.

I caught this mistake before I went any further. Can you find it? Yes, that little triangle piece was the wrong color. It still required taking 3 seams partially apart.
For those times when it’s not good enough, I’ve found an easy and fast way to rip it apart.

Using my seam ripper, I carefully slide the pointy end under the stich to cut the thread. I continue to do this on the same side about every 6-8 stitches or so. I’ve sewn two seams using black and white threads and am ripping out both.

Turning the piece around to the other side, I use my ripper to gently pull on a stitch. It will release and then I can pull the thread with my fingers. If it becomes stuck, I just wiggle it back and forth and it will release. This makes for a very fast way to unsew that wrong seam. Having a sharp seam ripper helps too. Yes, they do get dull.
If my stitches are very close together, I’ll use this method.

Opening the seam, I slide the pointy end of the ripper under a stitch or two to cut the threads. Then I gently tug on the fabric. It helps to keep one side taught with a finger as shown. This method takes a little longer but safely picks open that seam.
Recently, I showed our exchange daughter K. my latest sewing project and she pointed out a mistake right away.
I started this in the summer but, you know, life happened: quilt hops, trips, toothaches, and apples. So I am back sewing on it.
I had looked at these blocks many times and had never seen the mistake. So I sighed, picked up the seam ripper, and remembered my mom’s words of wisdom, “If you don’t want to rip, you shouldn’t be sewing.” Thanks mom. You are right, as usual.

Now it looks better. This is the after picture. The piece by the yellow arrow was turned wrong and needed to come out and be reset. It took several tries but, as you can see, I did get it back together again.
What I Learned Today:
Question: Do you spend a lot of time ripping apart your mistakes or are you a “that’s good enough” type of sewer? What’s your “go to” method of ripping apart your mistakes?
Linking:
Monday to:
Em’s Scrapbag at When Life Falls to Pieces Make A Quilt for Move It Forward
Beth at Cooking Up Quilts for Main Crush Monday (button on sidebar).
Beth at Love Laugh Quilt for Monday Making (button on the sidebar).
Scraptastic Tuesday (button on sidebar).
Tuesday to:
Yvonne at Quilting Jetgirl for Tips and Tutorials Tuesday (button on sidebar).
Wednesday to:
Lorna at Sew Fresh Quilts for Let’s Be Social (button on sidebar).
You may recall that I entered two quilts in the Blogger’s Quilt Festival in September. I wrote about the Little House Quilt here and the Plus Quilt here. While both of those quilts received votes neither received enough to win in their categories.
The Plus Quilt received 34 votes. That’s more than just my family and friends voting for it and so I thank you so very much. All of the quilts that were entered were gorgeous and I spent many hours looking at them and reading the posts.


While my quilts didn’t get enough votes to win a prize, I did win something for leaving a comment on Amy’s Creative Side blog. Thanks, Amy! She notified me of the win and then I proceeded to forget all about it. I was full-swing into the apple harvest (read about that here) and had other things on my mind. Three weeks later, I found this in my mailbox.

Next Steps in Machine Quilting: Free-Motion & Walking-Foot Designs by Natalia Bonner
I haven’t had much time to read it (we are still drying apples and making lots of apple dishes and desserts) but it looks incredible and I know I will use it a lot when I quilt. The book includes many diagrams of how to sew the various patterns and I can’t wait to have time to practice some of them.

It was even autographed by the author!
I have Natalia’s previous book, Beginner’s Guide to Free-Motion Quilting, and found it to be interesting and helpful when I was quilting the giraffe quilts. This new book will surely raise the bar (or should I say “raise the presser foot”) for me as a quilter!
What I Learned Today:
Question: Do you read quilting books just for fun or do you read them to learn to do?
Linking to Sew Fresh Quilts, Can I Get a Whoop Whoop? and Finished or Not Friday (buttons on the side bar)