Category Archives: Tu-Na Eats

Tu-Na Eats: Virtual Cookie Exchange

Now this is my kind of eating!! I hope you also enjoy this no-calorie trip to other quilt bloggers who have set aside their rotary cutters and fabric and have reached for bowls and spoons in order to whip up some fun seasonal treats for you to enjoy. Maybe you’ll find a new favorite that will become part of your family tradition.

Welcome to the Virtual Cookie Exchange hosted by Carol of Just Let Me Quilt. Thanks, Carol. You will find the list of participating bloggers at the end of this post.

virtual cookie logo 300x300

Continue reading

Tu-Na Quilts: Happy Valentine’s Day Finishes

I finished the Valentine’s Day wall-hanging I made for the Put a Little Love in Your Quilt Blog Hop last week. You can read more about it here. This wall-hanging was one of my goals for the 2018 Finish-A-Long and was posted here.

tunaquilts 7a

 I hung it outside and it’s been greeting our guests ever since.

tunaquilts 9a

I wanted something that says “A Quilter Lives Here.” 

I used a darker scrappy pink binding to frame out the hanging. It’s under a nice covered patio and is out of the sun. Hopefully, it’ll be protected enough to last a few seasons. Now, I will have to think of the next holiday and get something made to replace it, maybe something for St. Patrick’s Day or Easter or spring. 

Last week I also baked a batch of cookies—heart shaped ones.

tunaquilts 11a

And decorated them all fancy. It was a large batch so we took them to a couple of community dinners to share. They were a hit and I should have made more.

tunaquilts 10a

I used my favorite sugar cookie recipe found here and decorator frosting to pipe the borders and some sayings from conversation heart candies. I only have 5 decorating tips and should look for more or bring my extras down with me next year.

This week, I finished Tu-Na Helper’s Mug Rug. You can read more about his mug rug and find the link to the free pattern here

tunaquilts 1a

tunaquilts 4a

I chose some Chocolate Love by Audrey Jeanne Roberts for Studio e fabrics. 

I also made a mug rug for me using the free paper pieced rose pattern found here. I reduced the size and then trimmed it to 5.5″ so it would be the same size as the cup one. The rose sewed up easily.

tunaquilts 12a

I quilted a diagonal crosshatch about 1/4″ apart. I used painter’s tape to mark my first diagonal lines in each direction and then my seam guide for the rest of the lines.

I made the center of the rose darker. The next couple of rows of petals were a bit lighter, and the last couple or rows of petals were the lightest.

tunaquilts 2a

I used three different fabrics for the rose but could have used more as the petals are lost by all the quilting.

tunaquilts 5a


tunaquilts 3a

I used a 1 1/8″ strip to bind them. It didn’t need a bulky double binding.  Each mug rug finishes at 5.5 inches.

I gave Tu-Na Helper his Mug Rug this morning for Valentine’s Day

tunaquilts 6a

and he gave me…

tunaquilts 8a

a dozen long-stemmed roses!

* Update: That’s not all he gave me! I posted Tu-Na Quilts: The Rest of the Story here.*

What I Learned Today:

  1. I sew slowly. I was at a class this afternoon and am the furthest behind with that project.
  2. Being slow isn’t all bad. I didn’t have to rip out as much as some of the others.
  3. My seam ripper is rather dull. It’s time to get a new one.
  4. Completing the Valentine Wall Hanging was Goal #10 on my post Tu-Na Quilts: My Three Month Plan for the 2018 Finish-A-Long.
  5. I’ve still got 9 other goals to complete. 
  6. I might have to speed up the sewing to get more of my goals completed.

Question: What do you do special for Valentine’s Day? When the kids were little, I would make and decorate each of them a giant heart-shape cookie.

Thanks for stopping by and do come again.

Karen, Tu-Na Quilts

Linking to:

Wednesday Wait Loss at The Inquiring Quilter

Let’s Bee Social at Sew Fresh Quilts

Midweek Makers at Quilt Fabrication

Finished or Not Friday at Busy Hands Quilts

Can I Get a Whoop Whoop? at Confessions of a Fabric Addict

Show Off Saturday at Sew Can She

Tu-Na Eats: Cute Reindeer Cookies

It’s beginning to look a lot like Christmas 

And now it’s beginning to smell a lot like Christmas in my house. Tu-Na Helper is very excited that I’ve started baking. 

In fact, there’s lots of sweets being prepared across blogland this week. Today’s list of participating blogs for the Virtual Cookie Exchange is at the end of my post. Thank you Carol of Just Let Me Quilt for arranging another great blog hop.

Continue reading

Tu-Na Eats: 2017 Virtual Christmas Cookie Exchange Coming Soon

Coming Soon: You won’t want to miss this one!! Our creations are guaranteed not to include calories; unless, of course, you make them for real. Then all guarantees are voided. I’ll be back on the 7th to show and share. Here’s the line-up.

Continue reading

Tu-Na Eats: Angel Food Cake for Breakfast

Yes, you read the title correctly. While I pared down the grocery shopping so that I didn’t have much food left over to throw away before we closed up our house and migrated north, meals were getting rather interesting.

Two weeks before we left, we ran out of coffee creamer. No matter how much or loudly I pleaded that we needed to buy some, my husband insisted that we’d have to make do. I figured someone surely has been in that same position and must have posted recipes on the internet. The internet did not disappoint. There were tons of recipes but all were calling for sweetened condensed milk. I had none but I did have a can of evaporated milk and some sugar and about a tablespoon of vanilla extract. In the end, I created a really good substitute which actually improved with age. This homemade creamer lasted for the duration of our stay and I only threw about 2 tablespoons away.

However, we ran out of milk 3 days before we left our Arizona home which meant I’d have to eat my morning cereal dry or finish off the eggs and toast for breakfast.

I did convince my husband to buy a quart of strawberries so that the last few pieces of angel food cake could be eaten in style. Earlier in the season strawberries were 3 quarts for one dollar so I was surprised he splurged for the last one since it cost a whopping 77 cents!

1a

And that brings me to breakfast on the morning that we left our winter home earlier this week. There was no milk, no eggs, and no bread in the house. The only thing left to eat was the Angel food cake with strawberries and the remaining ice cream. I think I planned it all quite well.

What I Learned Today:

  1. Closing up a house takes much longer than one thinks or plans.
  2. Saying goodbye to the sun, friends, and cheap fruits and vegetables is hard to do.
  3. Saying goodbye to one fabric stash is almost impossible (which is why I am sneaking a few pieces home) but I am excited to say hello to the other one waiting for me.
  4. Home seems so far away.

Question: Do you make an angel food cake from scratch, buy it already made, or purchase a good box mix? I’ve come to the conclusion that angel food cake must be a regional item. Finding any brand of angel food cake mix in the Phoenix area is practically impossible. After looking for two winters for my favorite brand (Food Club—no affiliation) and not finding it, I bought and carted down several boxes of the mix with us last fall.

Tu-Na Eats: Fresh Squeezed Orange Juice

At first, I thought I should change the title to “Tu-Na Drinks” rather than eats but after reading this you will agree that the title is correct.

#3. I like fresh squeezed orange juice.

I mean — I really like — fresh squeezed orange juice.

2a

We have an orange tree in our backyard in Arizona. It’s wonderful to run outside in the winter come mid-January and grab a couple of oranges and juice them for breakfast.

6a

I set the juicer to the largest opening to get the most pulp. I’ve noticed that the oranges that I pick later in the season are bigger and juicer. One orange was so big it yielded a half cup of juice.

13a

Some of the oranges have a bit of green on their skins.

10a

Here’s how big they were. That’s a 1 cup Tupperware measuring cup on the left.


It didn’t seem to matter as they looked the same in the inside and were just as juicy and tasty.

11a

The orange on the left had green on the outside.


This year our harvest lasted into the first week of April. In fact, fruit was hanging on the tree while the tree was blossoming in early March. The air was very fragrant for a few days.

14a

When my grandson came to visit us the first winter we lived here, I offered him a glass of my fresh squeezed orange juice. He drank it slowly. When I offered him juice the next day he replied, “No, thanks. I don’t like to have to chew my juice.”

1a.jpg

A spoon (ok. a plastic spoon) can remain standing in a cup of my fresh squeezed juice.


What I Learned Today:

  1. Next January, when the oranges are ripe, seems like a very long time away.
  2. Juice made from oranges bought at the Fruit/Vegetable market or the grocery store does not taste the same as that coming from our tree.
  3. I still have some fresh grapefruit that needs juicing. 
  4. There is no need for us to plant a grapefruit tree. Grapefruit is found in abundance in our village. People pick their trees and leave the grapefruit in boxes along the curb or put it in the common areas such as our village’s pool or library for others to take.

Question: Pulp or no pulp?

Linking with Lee Anna at Not Afraid of Color for her I Like Thursday party. If you missed my first two “I like” posts you can catch them here.

#1. I Like the Saguaro Cactus

#2. I Like to Shop at Thrift Stores

Tu-Na Eats: Cranberry Pineapple Sauce

It isn’t the holidays without some of Mom’s Cranberry Pineapple Sauce.

8a


I made some for Thanksgiving and I imagine I’ll be making more for Christmas. In fact, it’s the only cranberry sauce recipe that I make anymore. I’ve tried a bunch of different recipes but I seem to always come back to this one. So I thought you might like to make it, too.

2a

Fresh plump red cranberries say Thanksgiving and Christmas are coming. I usually buy several extra bags to throw in the freezer to use during the year. Funny thing is that we found about 12 packages when we cleaned out the freezer this fall. Rinse the fresh or frozen cranberries.


Seems like this time of year the days go by so fast and there is so much to do. This sauce cooks up quickly and stays for several days in the fridge.

3a

Usually, I buy crushed pineapple for this recipe but I accidently grabbed some tidbits instead. “No problem,” said the food chopper as it quickly turned those tidbits into tiny little pieces. Like I always told my kids when they were little, “There’s always more than one way to solve a problem.” Since I only buy pineapple packed in it’s juice, I drain the juice and use it as part of the liquid called for in the recipe. Once the pineapple is drained, I add water to the measuring cup to make the two cups needed.


It even tastes better if you make it a day or two ahead.

4a

Boil the juice, water, and sugar for 5 minutes. I use a large kettle and stay close by. 


5a

Add the cranberries and boil without stirring until all the skins are popped open (about 5 minutes). That popping is like music to my ears. In fact, when I no longer hear the popping sounds, it tells me it’s done.


6a

I usually can’t help myself and stir it once or twice to check on the bottom layers. Besides that, I find stirring food at the stove to be comforting.


7a

Once all the skins are popped, remove from the heat and add in the pineapple. Chill for several hours before serving. It can even be made a day ahead of serving.


Here’s the recipe. Let me know if you make it.

Mom’s Cranberry Pineapple Sauce

  • 2 cups sugar (less if you like it more tart)
  • 2 cups liquid (pineapple juice plus water)
  • 4 heaping cups fresh or frozen cranberries, rinsed
  • 1 large can (20 oz.) crushed pineapple, drained 

Drain the pineapple into a two cup measuring cup. Add enough water to make a total of 2 cups of liquid. Combine the sugar, pineapple juice/water in a large kettle. Bring to a boil and boil for 5 minutes. Add the rinsed cranberries and boil without stirring until all the skins are popped, about 5 minutes. Remove from heat and add the pineapple, stirring well. Chill in refrigerator several hours before serving.

9a

I like it so well that I wouldn’t have to bother eating anything else for the meal.


What I Learned Today:

  1. My mouth is watering as I write this post so it must be time to make another batch.
  2. Cranberries sure have become expensive. It seems like just yesterday that I could buy a bag for 59 cents.
  3. I’ve always wanted to attend a cranberry festival somewhere. I remind myself of that fact each year at this time. One of these years, I’ll have to remind myself earlier in the year so I can do just that.
  4. My mom is a very good cook. Thanks mom!

Question: What is your favorite holiday food to make or it just wouldn’t seem like the holidays?

Tu-Na Eats: Painted Christmas Cookies

My oldest son was about three when we started making these cookies. That first year, we had a Christmas party with several of his little friends and all the kids used paintbrushes to paint the cut out Christmas shapes.

7a

The kids gather around the table painting and having fun. This pic was taken a couple of years ago although it feels just like last year. The cookies are painted before they are baked. When I first started this tradition, I bought a package of paintbrushes that I keep in the kitchen to be used only for this project.

The kids were proud of their accomplishments, even though those made by the younger ones contained many holes from pushing the brush too hard.

9aa

The “paint” is made with egg yolks, water, and food coloring gel (not the liquid kind). These cookies pictured here are done and ready to be transferred to a cookie sheet and lightly sprinkled with sugar before baking.

A family tradition was begun. Through the years, the kids’ painting skills grew and we continued to make and paint these cookies at Christmas time. Eventually daughter-in-laws and a son-in-law were added to the family and the cookies took on a real artistic flair.

5a

Close-up before baking

2a

After baking

3a

Before baking

1a

After baking

There were a few years that time got away from us finding us rolling and painting them on New Year’s Day. A few years we even forgot. But for the most part, it’s been a yearly tradition in our family. While they look complicated to make, they are very easy.

11a

Don’t these look too pretty to eat! I think they look like stained glass.

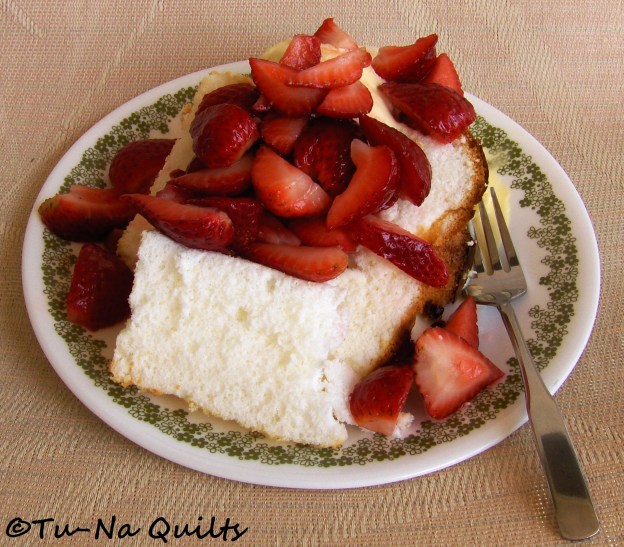
This same idea makes really pretty Easter cookies using bunny, butterfly, flower, carrot, and an oval (for an egg) cookie cutters. I hope you give them a try. If you do, let me know what you thought and how yours turned out.

12a

You don’t need artistic ability to paint these cookies. Even a few simple details make them look festive.

Painted Cookies Recipe

Make your favorite rolled cookie dough or use store-bought cookie dough. I’ve included my all-time favorite rolled cookie dough recipe—I use none other when needing a rolled cookie dough.

Roll the cookies to 1/8-1/4″ thick. (I roll them to about 3/16″ or so as I like a thicker cookie). After years of practice, I don’t measure anymore but just guess.) Cut out the cookie shapes using cookie cutters of your choosing. To make rolling out the dough easier, I wipe my counter with a damp cloth and immediately sprinkle a fine dusting of flour over it.

Mix the egg yolk paint using the recipe below. Using a fine paint brush, paint each cookie as you desire. Let one color dry before adding another color on top of it—it doesn’t take more than a few minutes (this is so that the colors don’t mix or run). Sprinkle lightly with sugar (optional) and bake at 350° for 8 minutes. Transfer to a cooling rack. Enjoy!  

Rolled Cookie Dough

Ingredients:

  • 3 cups flour
  • 1 cup butter, room temperature
  • 1/2 teaspoon baking soda
  • 1/2 teaspoon baking powder
  • 1/2 teaspoon salt
  • 2 eggs
  • 1 cup sugar
  • 1 teaspoon vanilla

Directions: Mix flour, butter, baking soda, baking powder and salt with a pastry blender or fork (like you would if you were making pie crust). In another bowl, beat eggs with a mixer, add sugar and blend well. Mix in vanilla. Stir egg mixture into flour mixture by hand. Roll into a ball and refrigerate at least an hour for easier rolling. If refrigerating overnight, remove from refrigerator 2 hours before using.

Egg Yolk Paint

Ingredients:

  • 3 egg yolks
  • 3/4 teaspoon water
  • Food coloring paste or gel (NOT liquid food coloring) in your desired colors. (This paste or gel can be found at cake supply shops and hobby shops that carry food decorating supplies such as Michaels,  Hobby Lobby, some JoAnn Fabrics, and can even be ordered online—I have no affiliations to any of these.)

Directions: Mix egg yolks and water. Divide into small containers like miniature muffin pans or liquid medicine cups. Add paste/gel colors and stir well. Use a new paint brush for each color. You don’t need a lot of “paint” as it goes a long way.

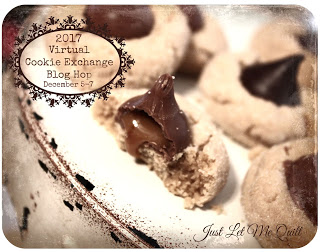
Virtual Cookie Exchange Blog Hop List

13

Here’s the list and links to other cookie bakers waiting to share their special treats and recipes with you. Be sure to click on the first link below to visit Carol at Just Let Me Quilt to enter the giveaway. Thank you Carol for hosting this virtual cookie exchange.

December 5

Just Let Me Quilt – Giveaway

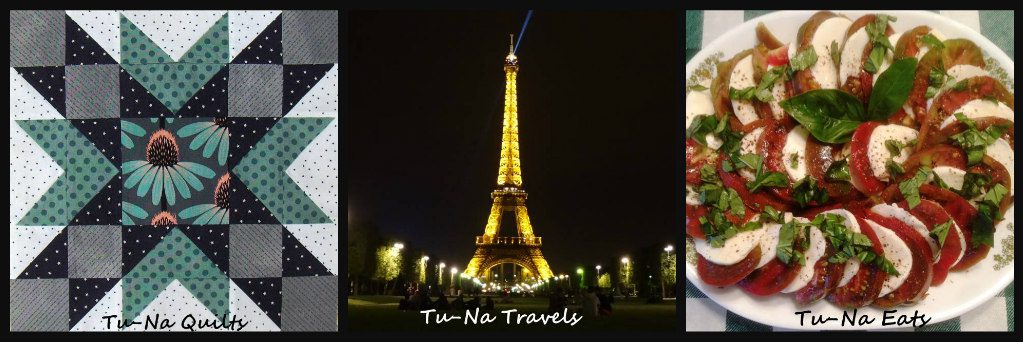
Tu-Na Quilts, Travels, and Eats Thanks for joining me here.

Kris Loves Fabric


December 6

Creatin’ in the Sticks

Brenda’s Quilting Blog

Bumbleberry Stitches


December 7

What’s Up With Kim

Granny Can Quilt

Rosemary’s Recipe – posted at Just Let Me Quilt


December 8

Deb’s Rustic Quilting

Treasured Nest

Just Let Me Quilt

Thanks for stopping by. If this is your first time here, welcome to my blog where I write about the things I love: quilting, traveling, and eating—well actually cooking and baking but that doesn’t sound as good. Click here to find out more about me. I started my blog in April 2016 and wrote an introductory post for the New Quilt Bloggers Hop that you can find here. This summer my husband and I spent 9 days traveling around Minnesota visiting 72 quilt shops and I wrote many posts about those adventures. You’ll find the first post here. But don’t stop there, continue to check out  the other posts about the quilt hop so you don’t miss all the fun, frivolity, and loot I acquired on that trip; plus you’ll get to visit some very cool quilt shops and see some spectacular pics of the trip.

What I Learned Today:

  1. I gain weight just by thinking about these cookies.
  2. I miss having my little ones running around the house. My house is now too quiet and time has gone by much too fast.
  3. Christmas seems to come faster every year.

Question: What is your traditional family food/dessert/treat for the holidays?

Linking to:

Beth at Cooking Up Quilts for Main Crush Monday (button on the sidebar)

Beth at Love Laugh Quilt for Monday Making (button on the sidebar)

Lorna at Sew Fresh Quilts for Let’s Bee Social (button on the sidebar)

Sarah at Confessions of a Fabric Addict for Can I Get A Whoop Whoop? (button on the sidebar)

Tu-Na Eats: Ghost Pie

I expected some special visitors Halloween evening so I whipped up a little treat earlier in the day.

piea

My mom taught me how to make a nice scalloped pie edge.


Each Halloween (well most of them) for as long as I can remember, I’ve made a special treat for our kids.

pie3a

I fill a baked pie shell with chocolate pudding. This year I used a cook and serve pudding but some years I use instant; it all depends on how much  time I have. After pouring the pudding into the pie shell, I cover it with plastic wrap to prevent it from forming a hard crust.


Although our kids are grown, my grandson was coming to trick or treat and that gave me just the reason I needed to continue the tradition.

booa

 After the pudding was set and cold (3-4 hours for cooked), I topped it with dollops of prepared whipped topping spreading it into the shape of a ghost. (Stir the topping first in it’s container to make spreading easier). You probably could use a stiff whipped cream if you were to eat it right away. Usually, I add brown M&Ms for eyes; none were to be found in this house today so this ghost has chocolate chip eyes instead.


Ding Dong…Trick or Treat…Run to the door to see who it is.

buzzpiea

It’s Buzz Lightyear (my grandson) and Woody (my son).


After we all ate a piece of that ghost pie, they said goodbye and were off to ring other doorbells. So I went up into the attic to help my husband check for bats. After all, isn’t that what everyone does on Halloween night?

What I Learned Today:

  1. One is never too old to stop dressing up for Halloween. (I am dressed up as a quilter–see the threads on my shirt).
  2. Watch out for that bottom step on the ladder.
  3. There are no bats in our attic. I had to see it for myself.

Question: How did you spend your Halloween? What are your Halloween traditions?